This guide is intended for advanced Salesforce admins. For Salesforce education, contact Salesforce directly or use trailheads for specific knowledge.
Introduction
This guide details how to create and configure a custom object in Salesforce for efficient management of blocked numbers. Using a dedicated custom object for blocked number querying offers several advantages over managing them in complex rule components:
Improved Performance: Avoids performance bottlenecks and slowdowns, especially when dealing with large block lists, by optimizing database queries.
Enhanced Scalability: Easily manage and expand your blocked number list as needed without impacting system performance.
Simplified Maintenance: Centralized management of blocked numbers makes updates and modifications easier.
Step-by-Step Configuration
1. Create the Custom Object
Navigate to Salesforce Setup.
Go to Object Manager.
Click Create and select Custom Object.
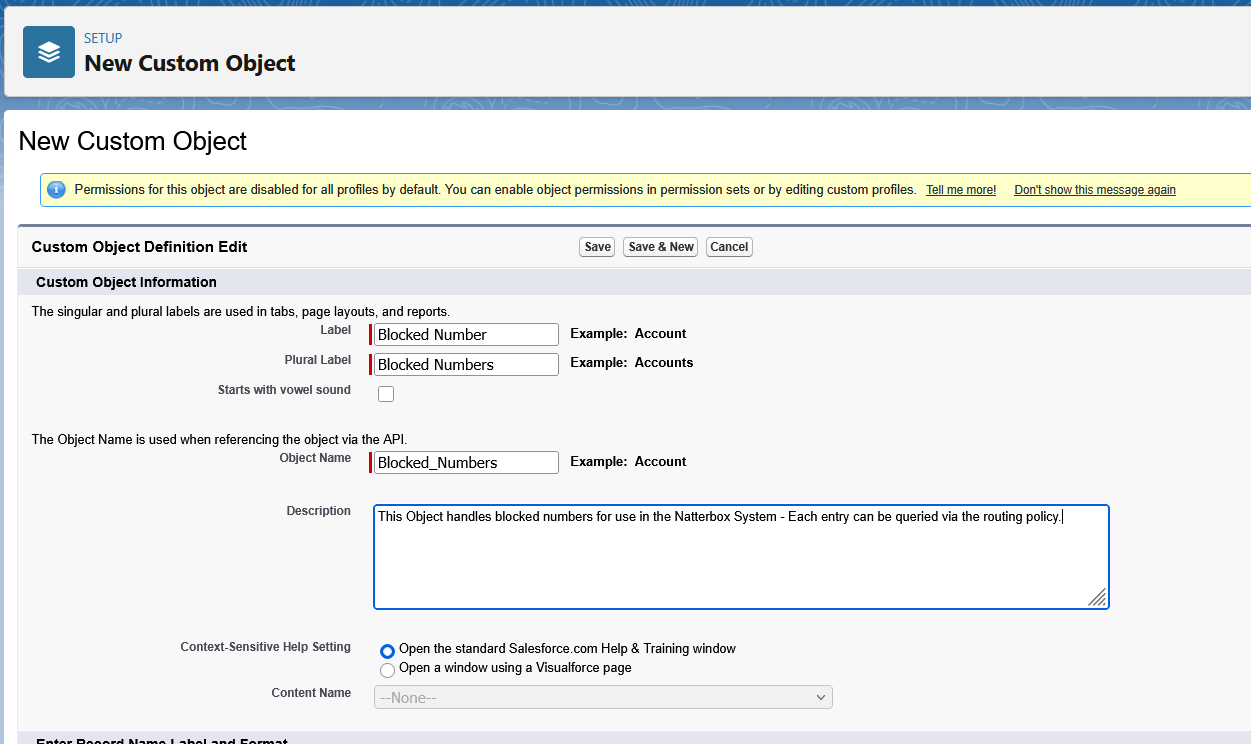
Enter the following:
Label: Blocked Number
Plural Label: Blocked Numbers
The Object Name will auto-populate.
In the Description field, enter "This object manages blocked numbers for use in call blocking."
Click Save.
2. Add Fields to the Custom Object
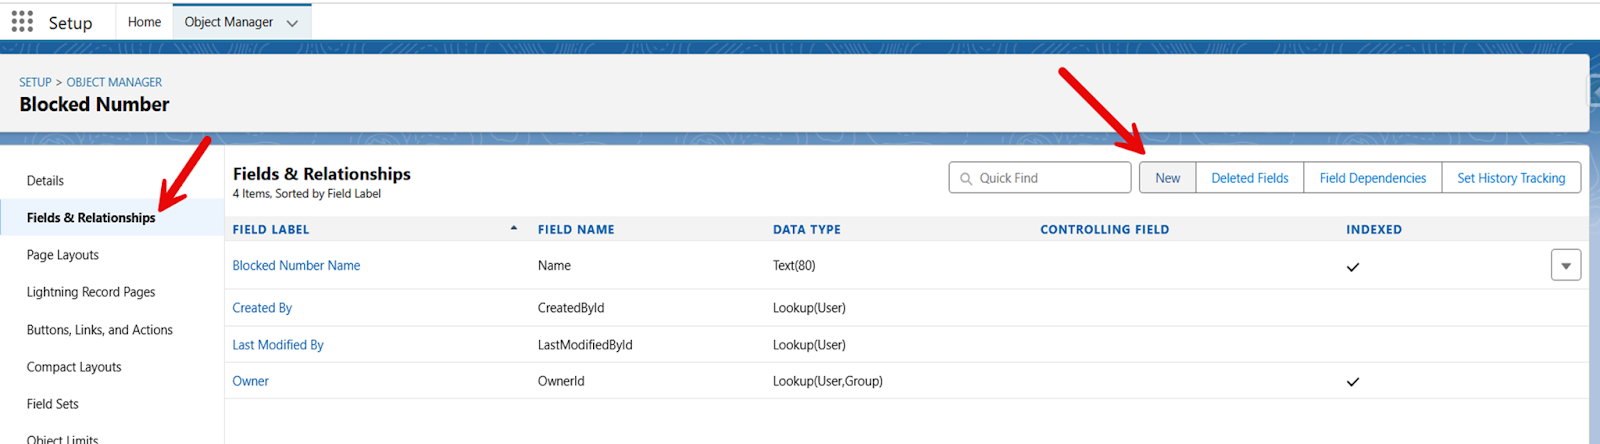
In the Object Configuration Menu, go to Fields & Relationships.
Click New.
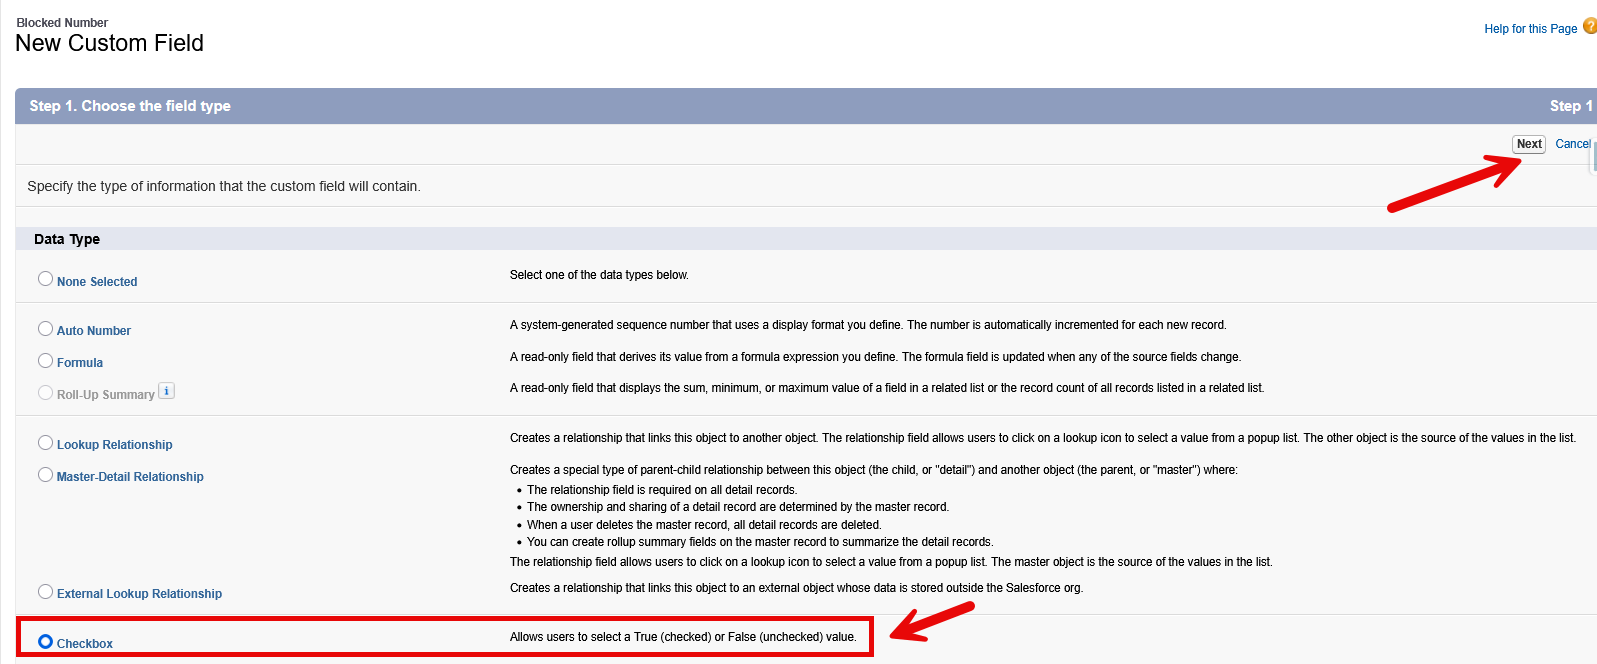
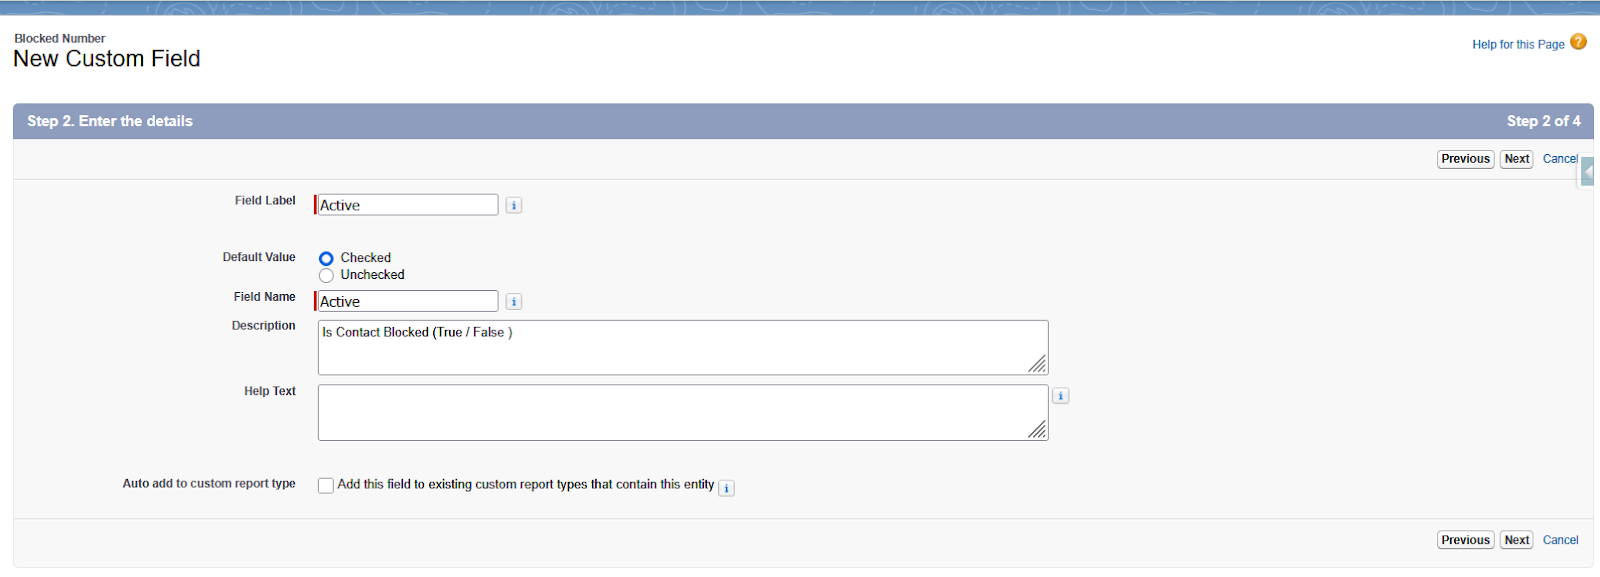
Create the "Active" Field:
Select Checkbox as the field type.
Click Next.
Field Label: Active
Default Value: Checked
Description: Is Contact Blocked (True/False)
Uncheck "Add this field to existing custom report types that contain this entity."
Click Next, Next, and then Save.
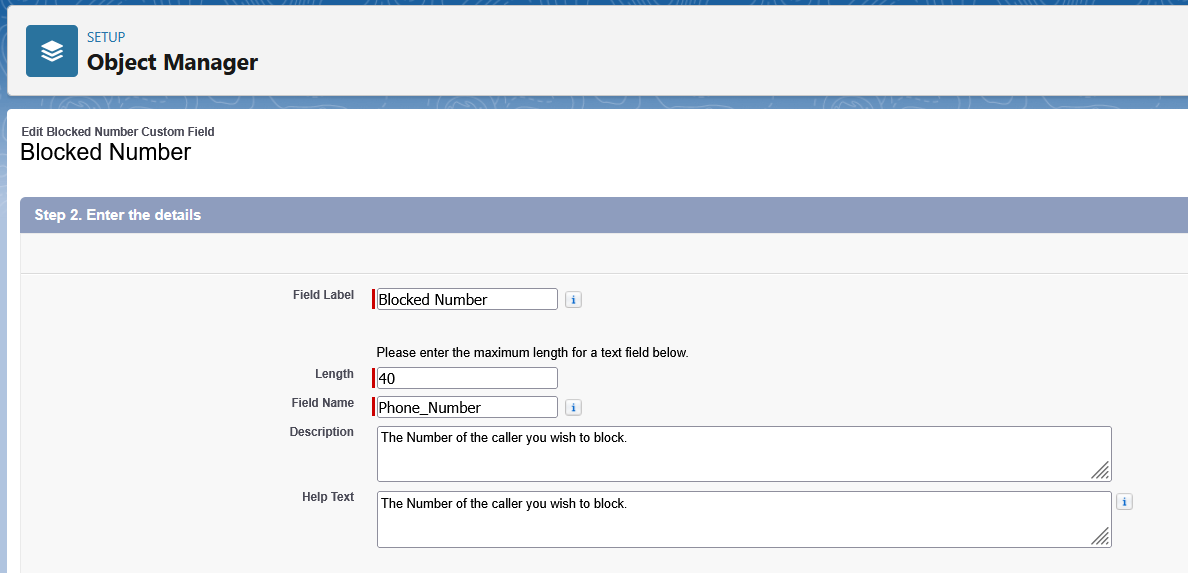
Create the "Blocked Number" Field:
Click New.
Select Text as the field type.
Click Next.
Field Label: Blocked Number
Length: 20 (adjust as needed to accommodate phone number formats)
Field Name: Phone_Number
Description: The phone number to block.
Help Text: Enter the phone number in E.164 format (e.g., 442035100500).
Click Next, Next, and then Save.
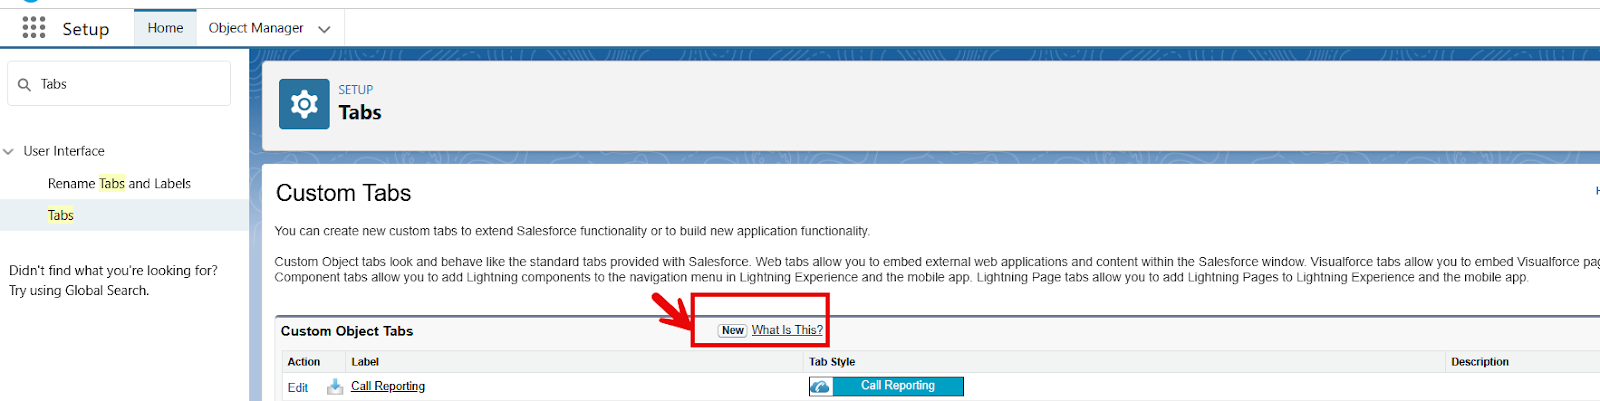
3. Create a Tab for the Custom Object
Go to Salesforce Setup Home.
Search for "Tabs" in the Quick Find box.
Click Tabs.
Click New.
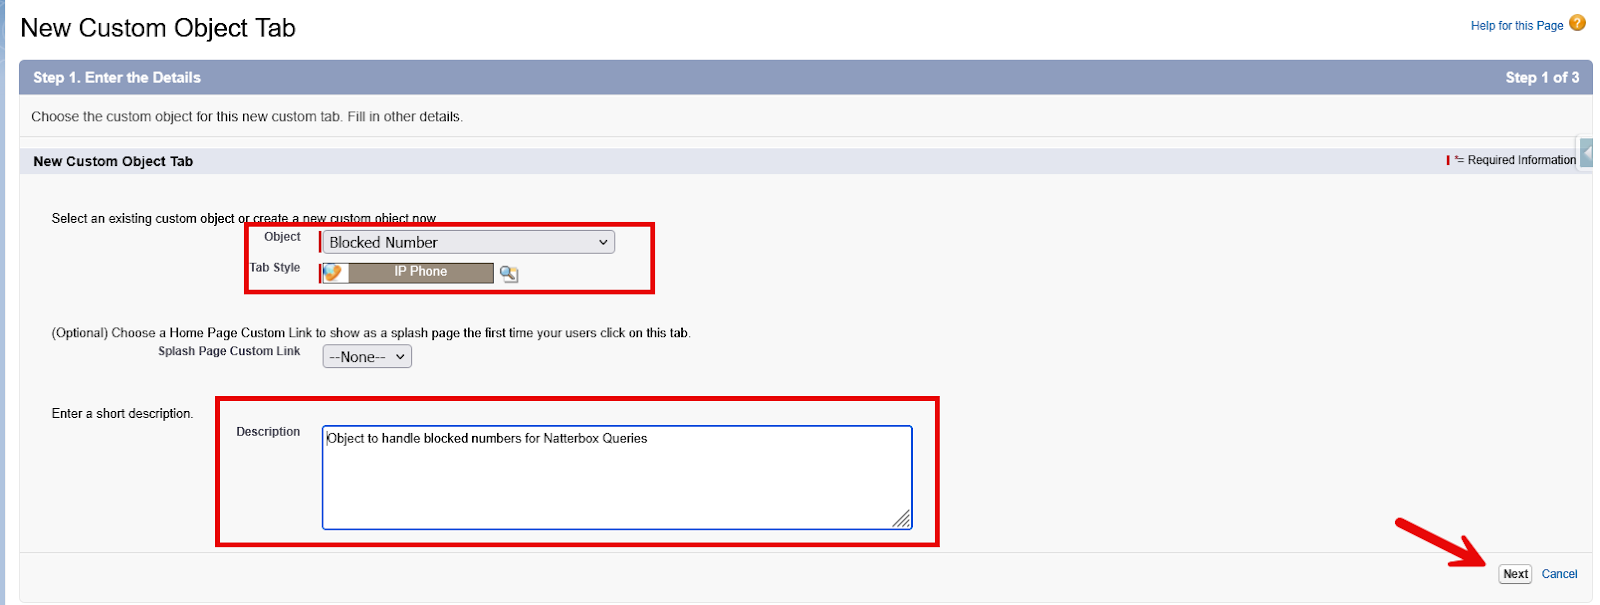
Select "Blocked Number" as the Object.
Choose a Tab Style (e.g., IP Phone).
Enter a Description: "Object to handle blocked numbers for Natterbox Policy Routing."
Click Next, Next, and then Save. (You can also configure tab visibility for specific roles).

4. Add Blocked Number Records
Use the App Launcher to find and select the "Blocked Numbers" object.
Click New.
Enter the following:
Blocked Number Name: A descriptive name (e.g., "John Smith - Cell")
Blocked Number: The phone number in E.164 format (e.g., 442035100500)
Active: (Checkbox) - Ensure this is checked to activate the block. (Set Active by default)
Click Save.
Repeat for all numbers you want to block.

.png?sv=2026-02-06&spr=https&st=2026-07-11T18%3A58%3A07Z&se=2026-07-11T19%3A10%3A07Z&sr=c&sp=r&sig=AmsuJaCd7YVLkTltMpqfJJzi4p4bLvlY500ClCqAXPA%3D)
5. Configure Call Policy
Navigate to the call policy where you want to implement the blocked number check.
Replace the existing block list rule component with a "Query Object" component.
Configure the "Query Object" component as follows:
Object: Blocked Number
Query Field: Blocked Number
Query Value: Use the appropriate macro for the incoming caller's number (e.g.,
$(E164CallerNumber)for inbound calls).Query Field: Active Equals True
Fields to Retrieve: (e.g., Blocked Number Name, Active)
.png?sv=2026-02-06&spr=https&st=2026-07-11T18%3A58%3A07Z&se=2026-07-11T19%3A10%3A07Z&sr=c&sp=r&sig=AmsuJaCd7YVLkTltMpqfJJzi4p4bLvlY500ClCqAXPA%3D)
Click "Test Query" and enter a blocked number to verify the configuration.

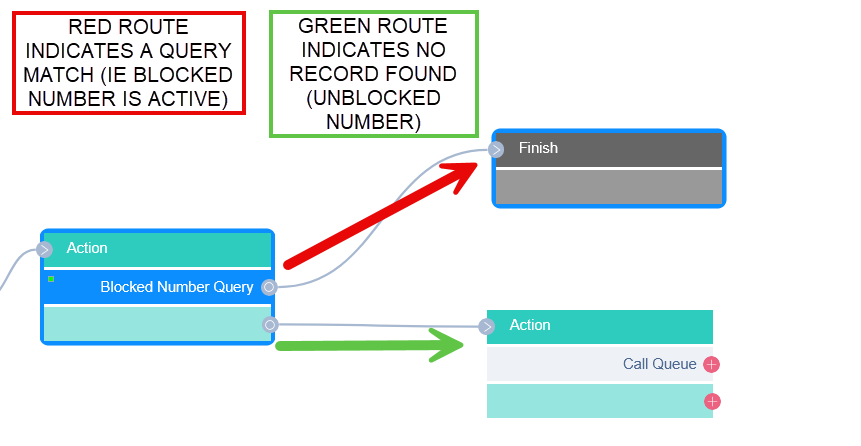
Configure the call routing:
If the query finds a matching active record (number is blocked), route the call to the desired destination (e.g., voicemail, disconnect).
If no matching record is found, route the call as normal.